Do you know the feeling? When you are looking for a fresh hand embroidery design pattern and you cannot find it? The frustration and lack of energy? The feeling of hopelessness?
That’s why I like to use Instagram and I follow several artists there. I often look for inspiration for my embroidery work. I found the latest post of Nini’s drawing and I really liked it. That is why I decided to write to her and collaboration with Nini started just like that. Totally unexpectedly.
Step 1: Nina published her amazing picture
I was browsing on Instagram and saw the latest post of Nini on Instagram.
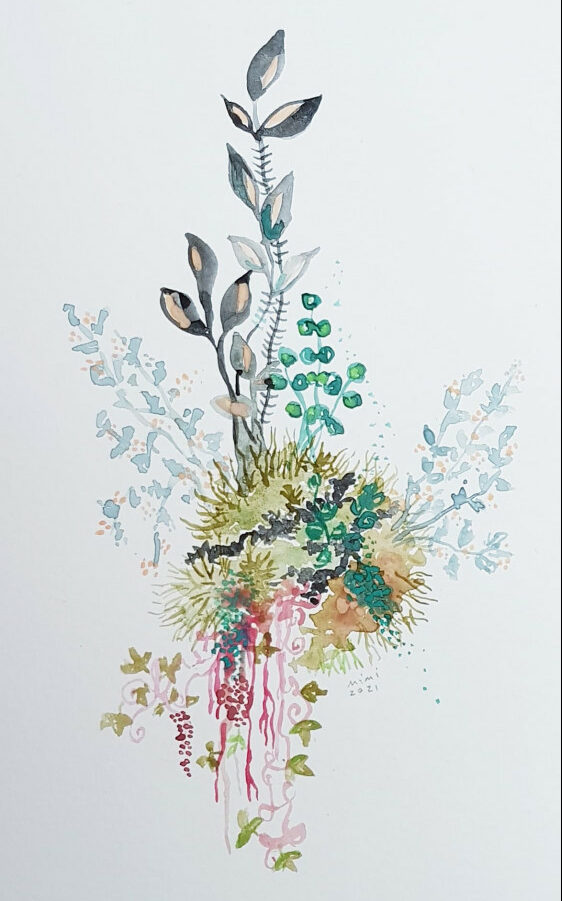
If you would like to know more about her work, you can check out @nina_spolar_nini’s Instagram profile and blog.
You can check out more of her work on her profile and under the hashtag #designbyninaspolar. You will be surprised what you will see there.
Step 2: We decided to collaborate
I have sent her a DM and she replied 🙂 I am very grateful to her that she was excited about collaborating with me. She has sent me her drawing and I started to develop my ideas on which colors and stitches I plan to use.
This will also be an upcycle project. I have been planning to make a tote bag from old pair of jeans. I think it will be an amazing addition to also add art embroidery design to it.
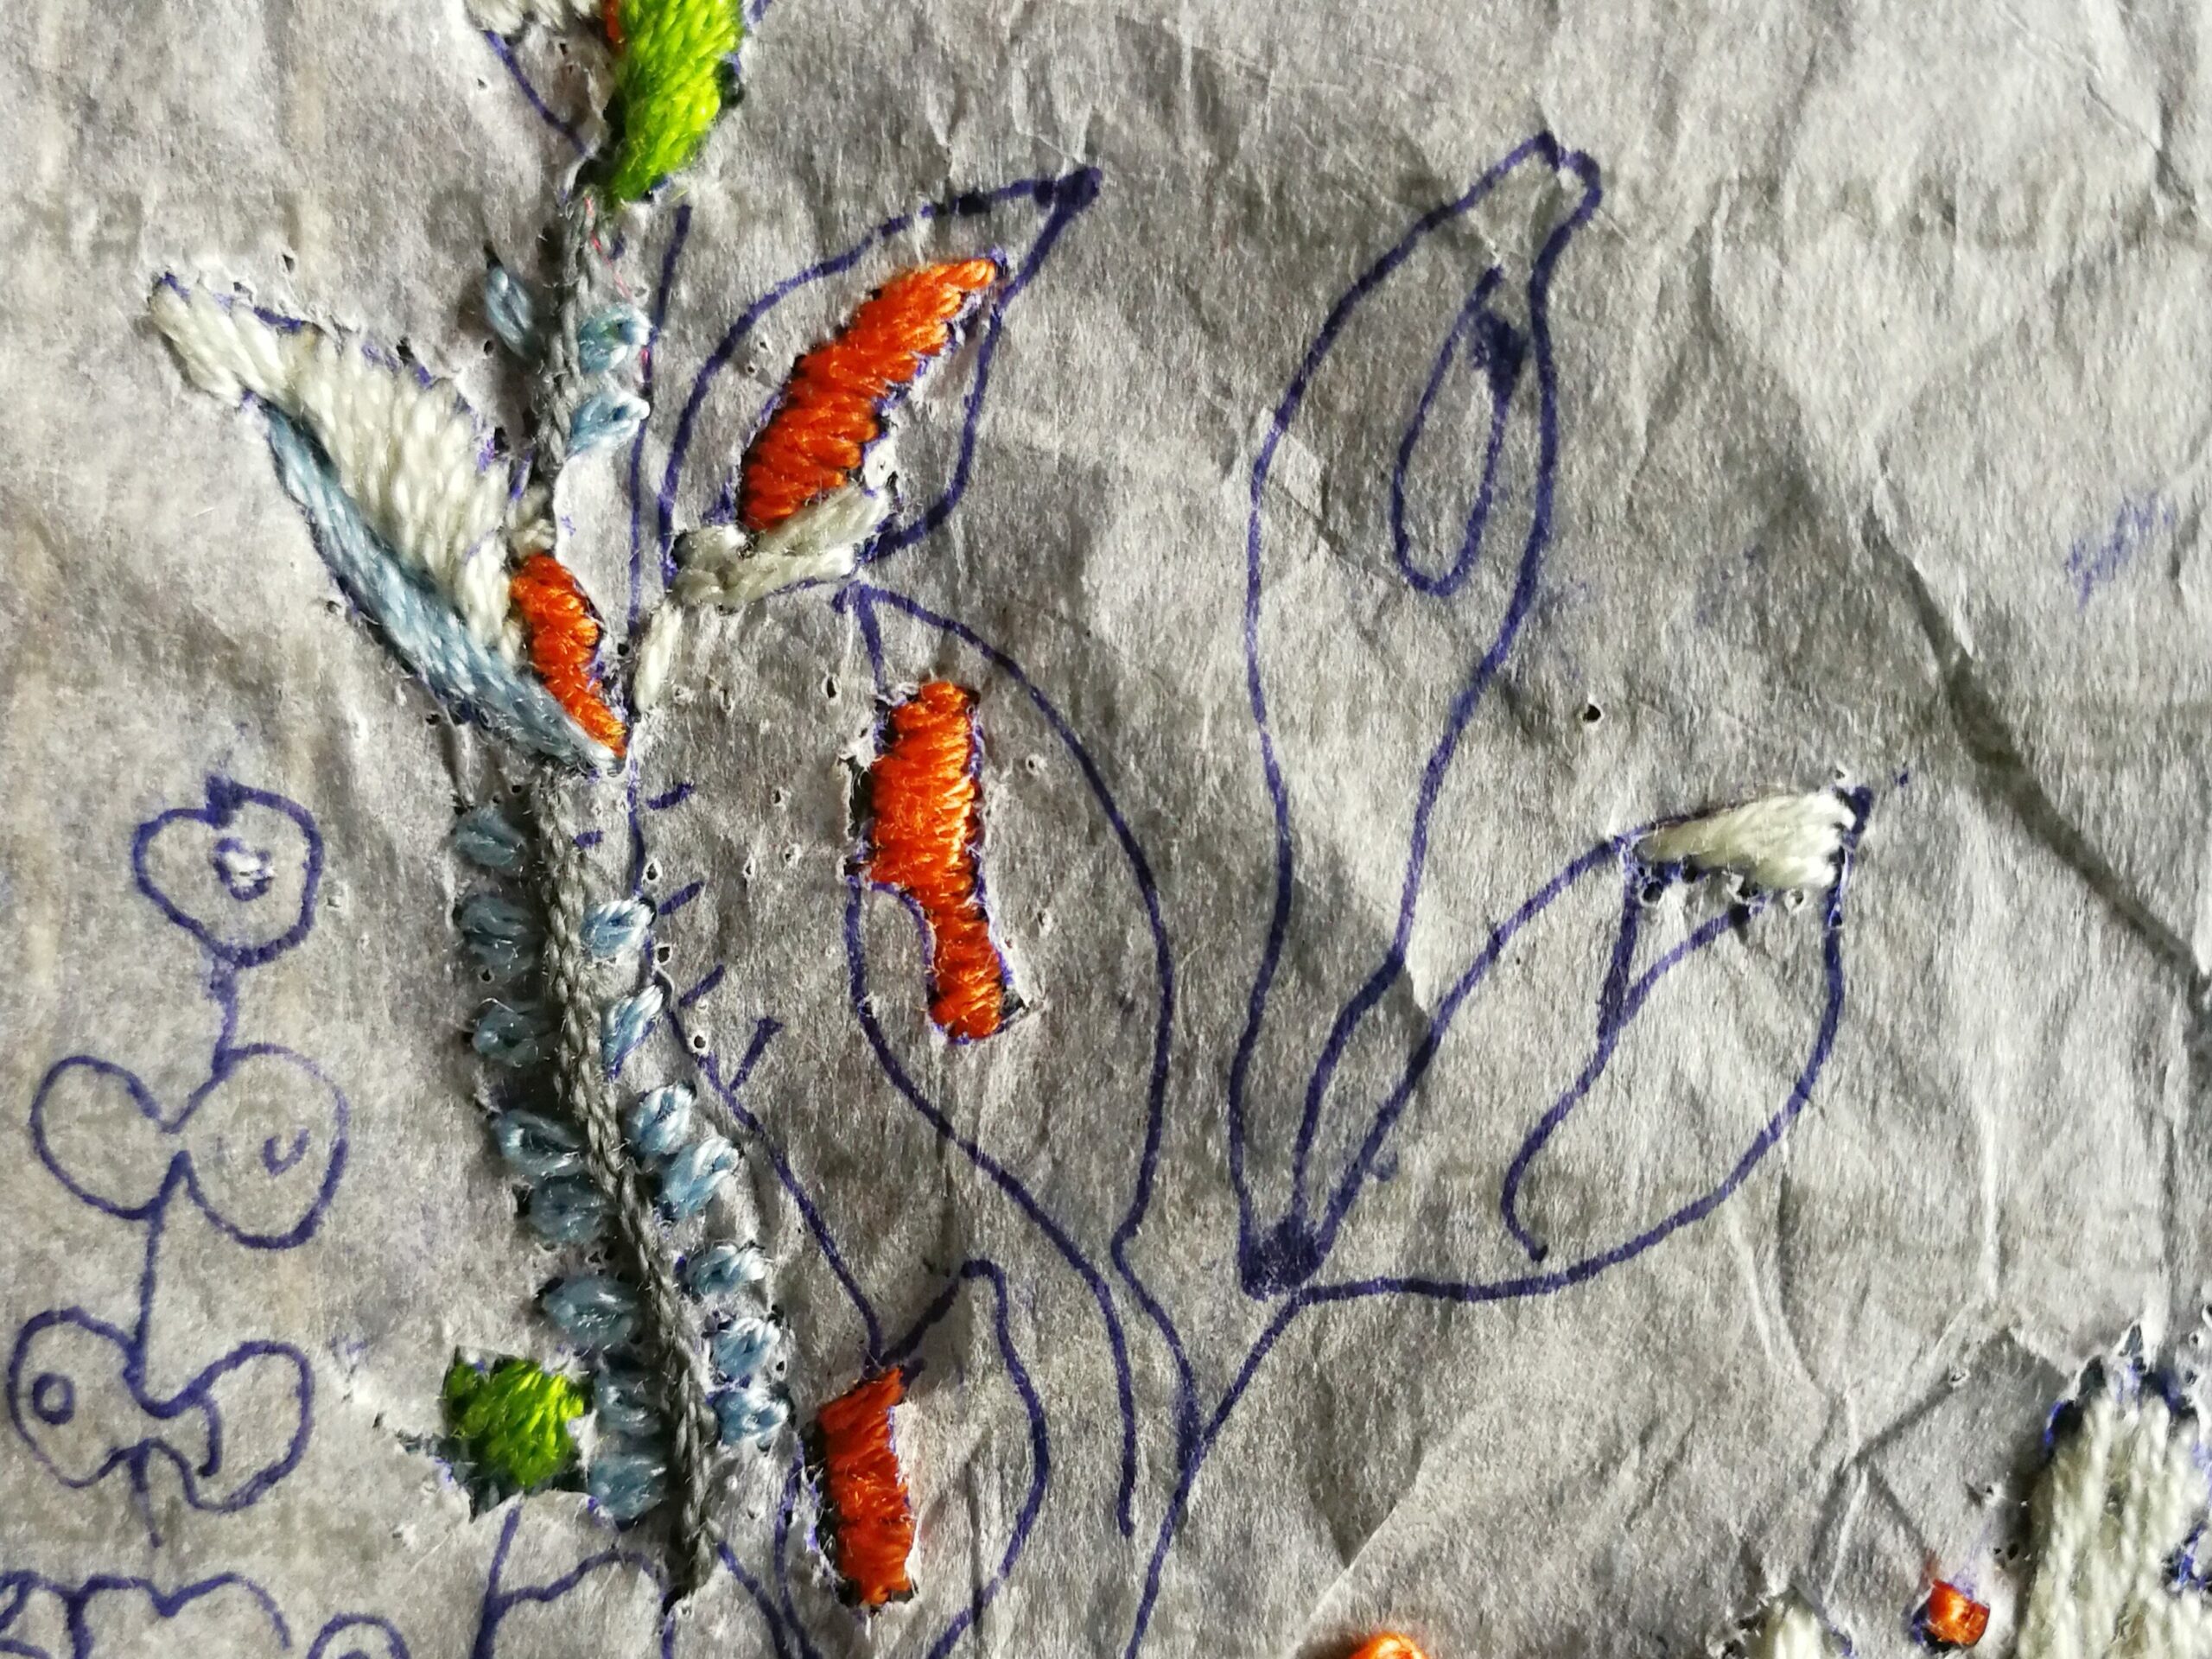
Step 3: I transferred the pattern
My usual pattern transfer techniques have failed, so I had to try a new one. I used a pencil to draw the pattern on very thin transfer paper. I used small pins to attach the transfer paper and I have started to embroider on it.

Step 4: I started to embroider
I have seen places where I want to use French knots. I have also selected an area to use a Padded silk Stitch. Some stitches I choose as I go.
You can check out my work under hashtag #myembroiderypassionscollabwithnini and I am adding my progress daily.
If you prefer to watch the embroidery process, can also check out short videos of my embroidery progress on my TikTok account 🙂
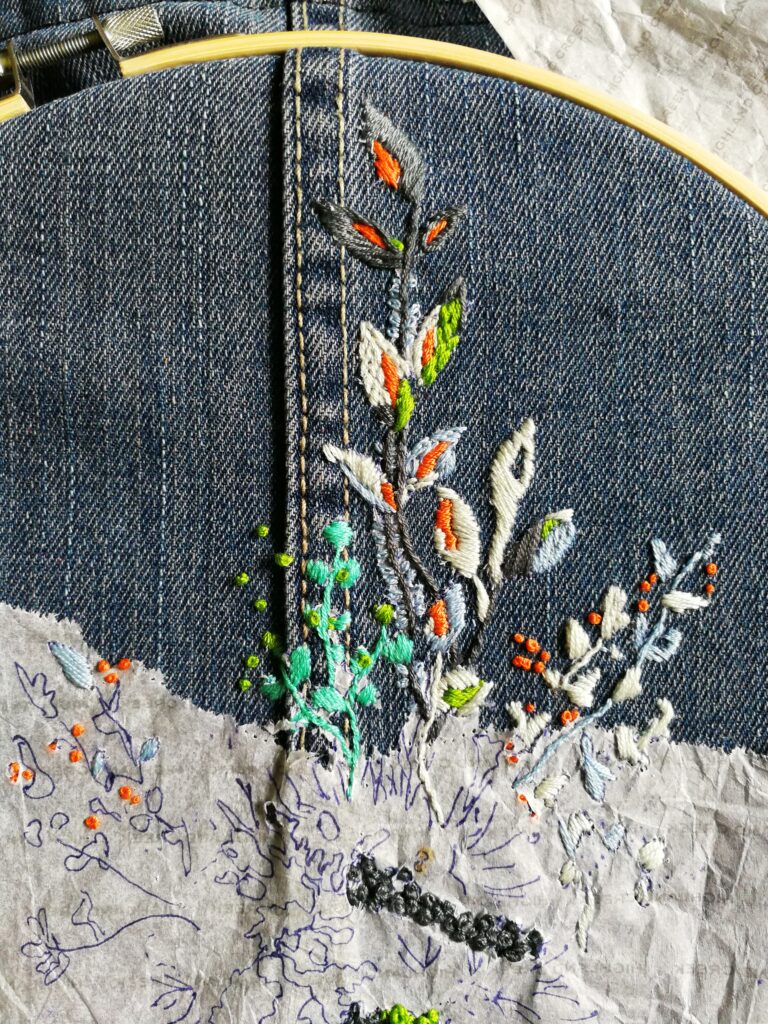
Step 5: Hand Embroidery Design Pattern – revealed part 1
I have finished the first part of my work and I have decided to take off the paper to see how it looks.
I can share with you my Favorite stitches that I have used here:
Please, let me know in the comments if you would like to see more detailed posts for the stitching techniques.

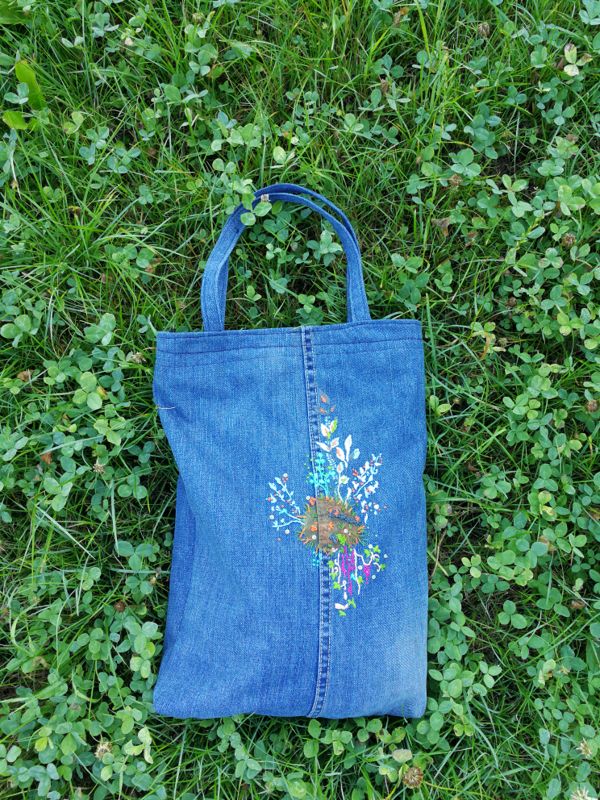
Step 6: Hand Embroidery Design Tote Bag finished
When I was halfway through with my embroidery, I have seen an amazing embroidery class from Ana Maria Restrepo and I got inspired by it. I have added painted elements to my embroidery, so the texture is even more standing out.
I have been really excited to see my embroidery finished.
I have been thinking for some time, how and where to wear it. In the end, I have decided to make a pretty tote bag – I never have enough of them 🙂
The end of the creative journey – create your own Hand Embroidery Design Pattern
How do you like the finished tote bag I have made? When I have started the project Hand Embroidery Design Pattern and Collaboration with amazing artist Nini, I didn’t know what I will create in the end. It was an amazing creative journey, full of twists and turns. I really like the different colors I could use together, they make my abstract garden embroidery really stand out.
I also like that old pair of jeans got new life and function. Sustainability and upcycling are some of the keys to a better and more clean future.
You can also check out the post on How to Sew a Hand Embroidery Flower Design Purse | Free Tutorial. I found a beautiful Lotus image on Pinterest and I have made my own embroidery interpretation. My finished result is the small purse that I carry everywhere I go 🙂
Until next time I wish you all happy creating,
Vesna
Absolutely love the outstanding hand embroidery diagram patterns featured on your site! The interest to element and inventive aptitude are absolutely commendable. It’s inspiring to see such a ardour for embroidery showcased here. Keep up the super work
Thank you very much for your kind words and interest in my embroidery work. I really love to embroider and explore new techniques, I will share more posts soon 🙂 Welcome to come back soon 🙂